Friday, May 20, 2011

Stars or Flowers??

I absolutely CANNOT decide what to do as the back for my quilt. While shopping, I decided it would cost the same to do plain jane backing as it would to piece another top. This is one of the few quilts I plan on sending off to be professionally quilted so hey, might as well get two sides out of it. Right? So here are two patterns that I love. I have enough fabric to do either one. Help me decide!

Twin Stars:

PROS:
- I think this pattern is BEAUTIFUL. Seriously, I get twitter-pated when I see it.
-My fabrics are very similar to the quilt above so I know my color variation will look good with this pattern.
CONS:
- I might be bitting off a little more than I can chew. Reality is, I'm a beginner quilter. Physically, of course I can do it, it just might be a very frustrating and long process.
-Because it's more difficult, it will take longer to piece. The faster I finish, the faster I can start another quilt!

Floral bouquet
PROS:
- This pattern is more simple and will be faster to piece.
-This totally fits the theme of my quilt. "Jardin des Amoureux" or Garden of Lovers.
CONS:
- I intended this quilt to be versatile as a Queen/King sized quilt. In order to fit on a King bed, the quilt has to be flipped sideways. This pattern has to be up/down so it can only show on the queen sized bed.
-Is it too feminine?  This is going in a guest room or our master bedroom. Kyle likes it so it must not be too bad, right?
-I'm not sure there's enough color variation in my fabrics for this.

-OR-
Something else all together?...

Thursday, April 28, 2011

Quilting Class

Chasing Cottons is having an awesome 12 week Quilting Class! A great place to get the basics. Go check it out here!

Chasing Cottons

Saturday, April 23, 2011

The anticipation is KILLING ME!

I finally bought a hutch to redo off of craigslist today. I've been dreaming of hutch makeovers for several months now. Literally dreaming. Yes, I am that big of a freak. lol. The house it was in was sorta dark and it's imperfections became much more obvious once I saw it in daylight (already loaded in the truck). Oh well! No going back now! It just needs some extra love. Can't wait to start! First, I have to finish painting our chest of drawers. So many marvelous things to do! 


 bonus: At the same estate sale I also scored a beautiful set of China! A complete set of eight (40 pieces) for 20 bucks! I checked it out online and it would retail for about $220 new. (I am waaaaay to cheap to ever pay that) CHA-CHING!! Kyle thought it was silly to buy china that would only used for Christmas time. But Christmas time is my favorite season and I absolutely love all things Christmas.  If anyone would use them, it would be me. Gosh, I feel so sophisticated now.

Disappearing Nine Patch

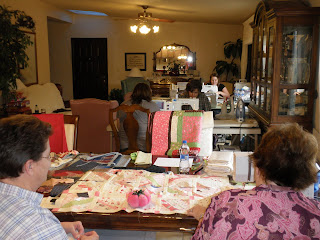
I have a sickness. I have become addicted to quilting. And, I love it! I just finished the top of my Disappearing Nine Patch Quilt using the French General Collection. My amazing Aunts are teaching me the ropes. I love our little Quilter's Anonymous "Meetings". It's so much fun to visit while we share our hobby. Not too shabby for my second quilt. A year ago I could hardly sew in a straight line. Seriously.

These are pictures from our last "Meeting".


And this is the Quilt I just finshed piecing.

Thursday, April 21, 2011

Kayla's Ribbon Board

This hand carved beauty(yikes!) cost me about a dollar. Every year the Glen Oak retirement community host a huge sort of rummage sale/senior citizen bazaar. It is AWESOME. I missed this year and I almost cried. This was sitting in my craft closet for several months before I gave it a makeover. I decided to make a ribbon board for my sister in  law's Christmas gift. Yes, that is the Last Supper. It was so old and worn it disintegrated when you touched it and it got everywhere. Gr-oss. 
I quickly discarded that filth(the canvas, of course, not Jesus) but kept the frame the canvas was stretched on. I covered it with batting and fabric.
  I laid out how I wanted my ribbons. I'm a little Type A and so I had to make sure that the ribbons laid between the rows of flowers. 


I used straight pins to keep them in place and to make them tight. This way when you flip it over they won't go crazy.


I stapled, then trimmed excess.

I used nails to secure the board into the frame.


Finished product:
I love the texture and interest the hand carved frame gives. Hopefully she likes it too!

Nursing Cover and Purse

A couple weeks ago I made this cutie for a friend's baby shower gift. I used Sew Much Ado's free tutorial here. It turned out great, I only worry that the heavier fabric will be too hot. If I made it again I would make it wider and shorten the strap.
I had extra fabric so a made a little nursing tote. That way when you're going to the mother's room, or where ever, you can quickly grab one thing and go. It fits the nursing cover, wipes, a few diapers, and plenty of room for things like butt cream and what-not.
No pattern was used for this. I was just winging it. I used a velcro fastener. A zipper would have been better, but I was doing this in the wee hours of the morning and this is what I had on hand.
The dots on the fabric are yellow and I had some cute yellow scrap fabric around (old tee shirt). Some people like to have a little clippy to keep track of what side they used last for feedings. I never did that but, if she doesn't either at least she's got a cute hair clip. Pretty sure I'm going to make another for myself. :)

Chair Redo

This the chair I re-did for my Craftroom. I got it for eight dollaroonies at Goodwill. Someone had attempted to repaint it and had done a LOUSY job. LOUSY! Trust me, you cannot see the drip marks and paint peeling! I, henceforth, will not buy furniture that has already been repainted. Some lessons you have to learn the hard way. I decided the chair wasn't worth the money to buy paint stripper, so i just sanded it and used the good old spray paint and recovering method.
 Here's the before:
 After:
 Before:
 After:
Easy-peasy Lemon Squeezy